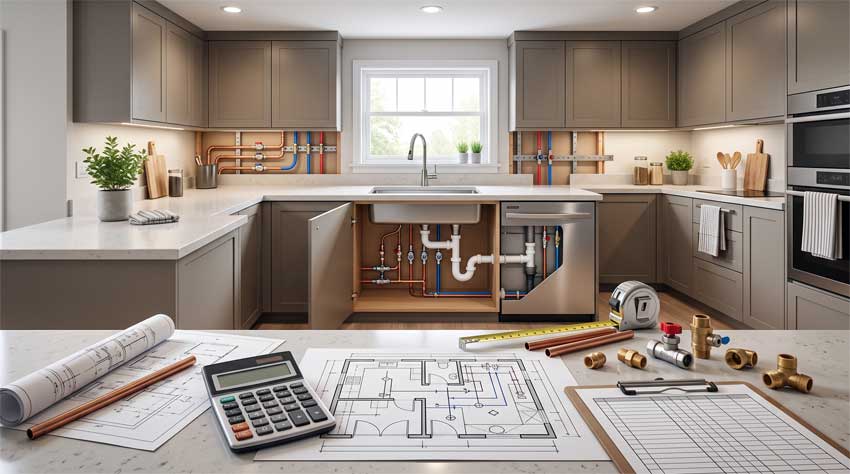
Kitchen Flooring Calculator

Kitchen Flooring Calculator Cost Guide
A Kitchen Flooring Calculator helps homeowners estimate the potential cost of installing or replacing kitchen flooring before requesting detailed quotations from flooring contractors or remodeling professionals.
Kitchen flooring costs vary according to floor area, material type, quality, project scope, subfloor condition, installation method, labour difficulty, demolition, and optional improvements.
This cost calculator supports both USA cost and UK cost estimates, displaying results in USD or GBP while allowing the floor area to be entered in square feet or square meters.
It separates material cost, labour cost, installation cost, additional work, and removal expenses to create a practical price estimate for vinyl, laminate, ceramic or porcelain tile, engineered hardwood, solid hardwood, and natural stone kitchen floors.
Kitchen Flooring Calculator
Estimate kitchen flooring costs in the USA or UK based on floor area, flooring material, quality, project scope, existing condition, installation method, labour difficulty, removal, and optional upgrades.
Please enter a valid value.
USA Kitchen Flooring Estimate
$0
Kitchen Size: 0 ft²
Cost Breakdown
Materials$0
Labour$0
Installation$0
Additional$0
Removal$0
FREE PDF ESTIMATE
Get Your Kitchen Flooring Cost PDF
Enter your details below to receive your kitchen flooring estimate, selected options, and complete cost breakdown as a downloadable PDF.
✓ Your PDF is ready!
This estimate is intended for preliminary budgeting. Actual kitchen flooring costs may vary based on flooring product, waste allowance, subfloor condition, installation pattern, appliance movement, transitions, moisture protection, local labour rates, taxes, and contractor pricing.
Free Kitchen Flooring Calculator
Material / Project Types
Kitchen flooring is available in a wide variety of materials, and each option has different costs, installation requirements, durability characteristics, and maintenance needs.
Luxury vinyl or LVP is a popular Budget-to-Standard option because it can provide water resistance, easy maintenance, and a wide variety of wood or stone effects. Floating systems can also reduce installation complexity.
Laminate flooring can provide the appearance of wood at a relatively affordable material cost. Products designed for kitchens should have appropriate moisture resistance, particularly around sinks, dishwashers, and refrigerators.
Ceramic and porcelain tile are common kitchen flooring choices because of their durability and resistance to moisture. Porcelain is generally denser and may cost more to cut and install than standard ceramic tile.
Also Read:
Engineered hardwood uses a real wood surface over a layered core. It can provide a natural wood appearance while offering more dimensional stability than some solid hardwood products.
Solid hardwood flooring can create a premium appearance and long service life, but material cost, finishing, moisture management, and installation requirements can increase the overall project budget.
Natural stone such as slate, limestone, marble, or travertine generally falls into a higher price range. Stone may require additional subfloor preparation, specialist cutting, sealing, and more labour-intensive installation.
Project scope can range from replacing only a small damaged kitchen section to installing continuous flooring through the kitchen and neighboring rooms. Projects involving layout changes may require additional subfloor repair, transitions, cabinet-area work, or appliance relocation.
Main Factors Affecting Cost
Floor area is one of the primary factors affecting kitchen flooring cost because most materials and installation services are priced by square footage or square meterage. Contractors also typically allow additional material for cutting and waste.
Material quality can significantly affect the final price estimate. Budget flooring generally uses economical products, while Premium and Luxury selections may include thicker wear layers, high-grade hardwood, imported tile, designer stone, or specialty finishes.
Existing condition is another major consideration. New construction with a flat and properly prepared subfloor is generally easier to work with. Replacement projects require removal of existing flooring, while damaged subfloors can increase repair cost substantially.
Installation type affects both labour cost and installation cost. Floating flooring systems can be relatively straightforward, while glued, nailed, mortared, or custom installations may require more preparation and specialist skills.
Labour difficulty increases when kitchens contain numerous corners, fixed cabinetry, islands, doorways, appliances, irregular walls, difficult transitions, or complicated floor patterns.
Additional work can also affect the final price. Premium underlayment, subfloor leveling, waterproofing membranes, underfloor heating preparation, replacement trim, and herringbone or specialty layouts can all increase costs.
Cost Breakdown
Material Cost: Material cost represents the flooring product required for the project. It varies according to kitchen size, flooring material, quality level, project scope, and existing condition.
Labour Cost: Labour cost includes preparation, measuring, cutting, fitting, alignment, finishing, and other professional work needed to complete the flooring project. Complex layouts and damaged substrates generally increase labour requirements.
Installation Cost: Installation cost represents the work associated with the selected installation method. Basic floating installations generally cost less, while custom tile, hardwood, stone, or complex patterned installations may require additional time and specialized skills.
Additional Cost: Additional expenses can include premium underlayment, subfloor leveling, waterproofing membranes, preparation for underfloor heating, replacement baseboards or trim, and custom flooring patterns. Basic, Standard, and Advanced levels adjust these allowances.
Removal Cost: Removal cost applies when existing flooring must be taken up before the new material can be installed. Tile and natural stone can be particularly labour-intensive to remove, while hardwood removal can also require additional time depending on how it was installed.
The calculator combines material cost, labour cost, installation cost, additional cost, and removal cost to create the estimated total project price.
Why Use This Calculator?
The Kitchen Flooring Calculator provides homeowners with a practical way to create an initial flooring budget before contacting installers, contractors, tile setters, carpenters, or remodeling companies.
It allows different flooring options to be compared quickly. Homeowners can compare luxury vinyl with porcelain tile, engineered hardwood, solid hardwood, or natural stone and see how Budget, Premium, and Luxury specifications affect the price estimate.
The calculator also helps account for expenses that can be overlooked when focusing only on the flooring product. Professional projects may require demolition, disposal, subfloor preparation, leveling, underlayment, waterproofing, adhesives, grout, transitions, trim, custom cutting, and appliance movement.
USA and UK pricing can be selected independently from measurement units. Selecting USA displays the estimate in dollars, while selecting UK displays it in pounds. Square feet or square meters can be chosen regardless of country. When square meters are selected, the calculator converts the area internally using 1 square meter = 10.7639 square feet while continuing to display the original kitchen size in square meters.
The estimate is intended as a preliminary budgeting tool rather than a guaranteed contractor quotation, but it provides a useful starting point for comparing kitchen flooring installation cost, replacement cost, repair cost, material cost, and labour cost.
Kitchen Flooring Calculator: Plan Your Floor With Confidence
Quick Answer
A Kitchen Flooring Calculator estimates how much flooring your kitchen needs and provides a practical budget range for the finished project. Use the result as a planning baseline, then check waste, subfloor condition, installation requirements, and contractor scope before committing to a final budget.
A Kitchen Flooring Calculator is most useful when you treat the result as a decision-making tool rather than a contractor quote. Two kitchens with the same floor area can end up with very different final costs once cutting waste, transitions, cabinetry, appliance clearance, subfloor work, and installation method are considered.
The first number to look at is not always the cheapest total. A lower-cost floor that performs poorly around repeated spills, cannot be repaired easily, or becomes difficult to match later may create a less attractive long-term outcome than a slightly more expensive option.
For homeowners in the United States, estimates are commonly discussed in square feet and dollars per square foot. UK projects are typically priced in square metres and pounds per square metre. A well-planned Kitchen Flooring Calculator estimate should help you compare those markets without pretending that UK prices are simply converted US prices.
Kitchen Flooring Planning Summary
- Use the calculator result as an early budget range, not a guaranteed quotation.
- Order enough material for cuts, breakage, pattern layout, and future repairs.
- Choose flooring for kitchen conditions, not purchase price alone.
- Check the subfloor before treating the estimate as final.
- Compare contractor quotes only when they cover the same work.
- Follow the flooring manufacturer’s installation instructions when they differ from general advice.
How to Read Your Kitchen Flooring Calculator Result
The most useful way to read a Kitchen Flooring Calculator result is to separate flooring quantity from project budget. Flooring quantity tells you how much product may need to be ordered. The project budget reflects the wider job around that flooring.
Suppose a 180-square-foot kitchen produces a material requirement of about 198 square feet after a waste allowance. That figure helps with ordering, but it does not tell you whether the subfloor needs leveling, a doorway needs a transition strip, a refrigerator must be moved, or old tile must be removed first.
A Kitchen Flooring Calculator estimate is usually most reliable during early planning when the room dimensions, flooring choice, and visible site conditions are known. Once demolition begins, hidden conditions can change the scope.
Think of the result in three layers:
- Low scenario: straightforward layout, suitable subfloor, simple installation, limited preparation.
- Typical scenario: normal cutting, several transitions, standard preparation, and professional installation.
- Higher scenario: damaged or uneven substrate, difficult demolition, complex layout, premium material, or specialist installation.
The estimated range deserves more attention than a single exact number. A precise-looking figure such as $4,287 can imply a level of certainty that does not exist before the floor is inspected.
Expert Tip
If your calculator result and contractor quotation differ sharply, compare the scope line by line before assuming either number is wrong. Removal, preparation, trims, appliance handling, and minimum labor charges often explain the difference.
How Much Extra Flooring Should You Order?
Most kitchen projects need more flooring than the exact measured floor area because cuts, breakage, pattern alignment, and unusable offcuts create waste. The right allowance depends on the product and layout rather than one universal percentage.
Flooring Quantity Formula
Flooring Required = Measured Floor Area × (1 + Waste Allowance)
If a kitchen measures 180 square feet and the selected allowance is 10%, the order quantity becomes 198 square feet:
180 × 1.10 = 198 sq ft
A simple rectangular click-lock floor generally creates less cutting than a room with an island, angled wall, several doorways, or intricate pattern. Herringbone and diagonal layouts can create more offcuts because more pieces are cut at the room perimeter.
Also Read:
Large-format tile deserves extra attention because a broken or badly cut piece represents more lost material than a small tile. Replacement pieces may also need to match the same shade or production batch.
Angi’s 2026 vinyl flooring guidance notes that buyers may need about 10% extra for installation waste, while also recommending professional guidance for more difficult layouts. That is a useful reference point, not a rule for every material or room. See Angi’s 2026 vinyl flooring cost guidance.
Keeping several spare planks or tiles after installation can also be valuable. A matching replacement may be difficult to find several years later if the product line, color batch, or finish changes.
What Makes Flooring Suitable for a Kitchen?
Kitchen flooring has to deal with conditions that are less forgiving than those in many bedrooms or formal living spaces. Water around sinks and dishwashers, dropped cookware, food stains, heavy appliances, repeated cleaning, and concentrated foot traffic all affect material performance.
Water and spill tolerance matter because a surface can resist water while the joints, edges, or subfloor remain vulnerable. A product marketed as waterproof does not make the entire floor assembly immune to leaks.
Scratch and dent resistance becomes more important in kitchens with pets, bar stools, rolling carts, or heavy traffic. A hard tile may resist many surface scratches but can chip if a heavy object lands on an edge. Wood may dent but can sometimes be repaired or refinished.
Comfort also matters. Tile and stone feel firm underfoot and may feel cold without radiant heating. LVT and some laminate systems generally feel less hard, especially when installed over compatible underlayment.
Repairability is easy to overlook during purchase. Individual floating planks may sometimes be replaced, but reaching one in the middle of a room can require substantial disassembly. Tile can be replaced individually if matching stock is available. Solid wood may offer refinishing options that many synthetic floors do not.
The Kitchen Flooring Calculator should therefore be used alongside performance criteria. Price alone does not identify the best material for a working kitchen.
Kitchen Flooring Comparison
| Flooring | Water/Spill Resistance | Scratch/Dent Risk | Maintenance | Repairability | DIY Difficulty | Best Fit |
|---|---|---|---|---|---|---|
| LVP/LVT | Generally strong, product dependent | Can scratch or dent | Low | Moderate | Low to moderate for click systems | Busy kitchens needing practical moisture resistance |
| Laminate | Varies widely by product | Good surface wear resistance; edge damage possible | Low | Moderate | Low to moderate | Budget-focused kitchens using kitchen-rated products |
| Ceramic Tile | High at surface level | Hard surface; can chip | Moderate | Good if matching tile is available | High | Durable floors with suitable substrate |
| Porcelain Tile | High | Very hard; edges can chip | Moderate | Good if matching tile is available | High | High-traffic or moisture-prone kitchens |
| Engineered Wood | More moisture-tolerant than many solid woods, product dependent | Can scratch or dent | Moderate | Varies with wear-layer thickness | Moderate | Natural wood appearance with improved dimensional stability |
| Solid Hardwood | Requires moisture discipline | Can scratch or dent | Moderate | Often strong due to refinishing potential | High | Premium interiors where repairability and natural wood matter |
| Natural Stone | Varies by stone and sealer | Hard but some stones can stain or etch | Moderate to high | Specialist repair may be needed | High | Premium kitchens where appearance justifies higher maintenance |
For households worried about repeated spills, LVP/LVT and porcelain tile often make practical shortlists, provided the installation system and substrate are suitable. A Kitchen Flooring Calculator can then compare the budget effect of those options.
For homeowners prioritizing natural appearance and potential repairability, engineered or solid wood may deserve consideration despite the need for tighter moisture management.
Tile can be highly durable, but durability is not the same as comfort. A household that spends hours standing in the kitchen may value a softer-feeling surface more than maximum hardness.
NWFA publishes industry-accepted technical guidance for wood-floor installation, moisture, and jobsite preparation. Review the National Wood Flooring Association technical guidelines.
Cost Comparison by Flooring Choice
The figures below are market benchmarks, not guaranteed kitchen quotes. They help position one material against another before you run a more specific Kitchen Flooring Calculator estimate.
| Flooring Type | Typical US Installed Benchmark | Typical UK Benchmark | Cost Position | Main Cost Risk |
|---|---|---|---|---|
| Vinyl / LVP / LVT | About $2–$22 per sq ft across vinyl categories and installation conditions | Checkatrade lists LVT around £35/m² material plus about £45/m² installation | Budget to mid-range | Subfloor prep, premium products, complex layout |
| Laminate | Home Depot lists about $3.80–$4.80 per sq ft for a typical installed laminate benchmark | About £30/m² material plus £30/m² fitting | Budget | Moisture-rated product selection and preparation |
| Ceramic Tile | Angi reports broad 2026 installation ranges around $12–$45 per sq ft | UK floor tiling commonly quoted around £110/m² including standard materials and labor in Checkatrade’s 2026 guide | Mid-range | Preparation, pattern, cutting, substrate condition |
| Porcelain Tile | About $9–$50 per sq ft in Angi’s 2026 porcelain installation data | About £90/m² for a mid-range installed porcelain benchmark | Mid to premium | Large-format cutting, leveling, complex layout |
| Engineered Wood | About $7–$20 per sq ft fully installed | About £50/m² material plus £45/m² fitting | Mid to premium | Wood grade, plank dimensions, moisture control |
| Solid Hardwood | About $6–$12 per sq ft for common installations, with higher-end projects reaching roughly $13–$25 | About £80+/m² material plus £35–£60/m² installation | Premium | Species, finish, installation method, moisture |
| Natural Stone | Highly project-specific | Checkatrade lists many natural stone tiles around £30–£100/m² before full project variables | Premium | Stone type, sealing, substrate, specialist cutting |
US benchmarks above draw from current Angi and Home Depot market guides, including vinyl, tile, engineered hardwood, hardwood, and laminate data. UK figures use current Checkatrade flooring and tiling guides rather than currency conversion. See Angi’s 2026 hardwood flooring data, Angi’s engineered hardwood data, Home Depot’s laminate installation benchmark, and Checkatrade’s June 2026 UK wood flooring data.
Tile costs can swing much more than simple material pricing suggests. TCNA emphasizes that successful tile systems depend on a properly designed and prepared substrate, while its technical resources also highlight flatness requirements for larger tile formats. See TCNA installation guidance.
Cheap Flooring Can Cost More Over Time
A low purchase price does not automatically mean poor value, but it should not be the only number used in the Kitchen Flooring Calculator decision.
Imagine two connected kitchen and dining areas. The cheaper floor saves several hundred dollars at installation, but five years later a damaged section cannot be matched because the color has been discontinued. Repair may then require replacing a much larger continuous area.
Wear-layer quality matters with many resilient floors. Repairability matters with wood. Sealing and maintenance matter with stone. Moisture exposure matters with products built around wood-fiber cores.
Solid hardwood may cost more upfront, but one of its advantages is the possibility of sanding and refinishing when the floor construction allows it. Engineered wood may offer some refinishing potential, but that depends on the thickness of the real-wood wear layer.
The sensible comparison is not “cheap versus expensive.” It is purchase cost + installation risk + maintenance + repair options + likely replacement consequence.
Should Kitchen Flooring Go Under Cabinets?
Kitchen flooring should not automatically be installed beneath every cabinet. The correct approach depends on the flooring system, cabinet installation, expansion requirements, and manufacturer instructions.
Floating floors are a common example. Many floating systems need room to expand and contract, so trapping the floor beneath fixed cabinetry can conflict with installation requirements. That does not mean every floating product follows identical rules; the product manual controls.
Tile and some traditionally fixed wood floors are different because they are bonded or mechanically fastened rather than floating as one continuous sheet.
Cabinet planning also affects future remodeling. Flooring installed wall-to-wall can make later cabinet layout changes easier, but it may use more material. Installing only to cabinet edges can save product but creates more dependency on the existing footprint.
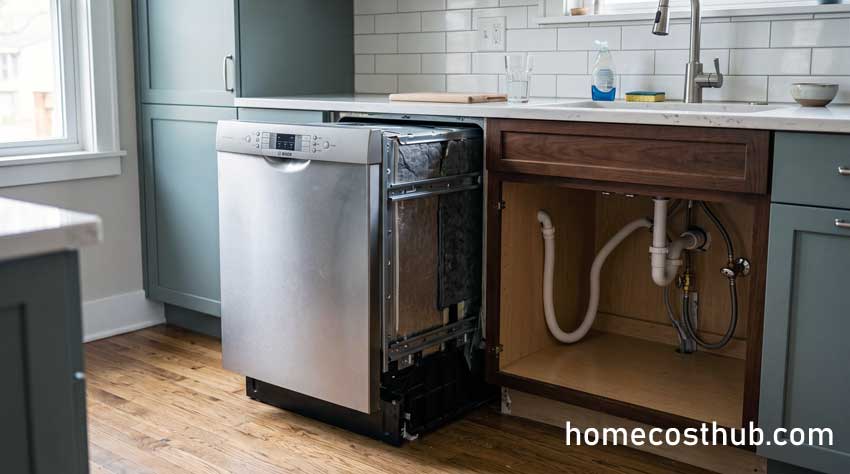
Dishwashers deserve special attention. A new floor can raise the finished surface enough to reduce clearance beneath a countertop. Check appliance dimensions before the final flooring and cabinetry sequence is locked.
Flooring Before or After Kitchen Cabinets?
For a full remodel, floor and cabinet sequencing should be decided before either trade starts. For a flooring-only project, existing cabinets often remain in place and the new floor is fitted around them.
Tile or fixed wood may be installed before cabinets in some project designs, while floating floors are often handled differently because of expansion requirements. Islands make the decision more important because they create large fixed loads in the middle of the room.
Toe kicks, dishwasher removal, refrigerator movement, doorway thresholds, and finished-floor height all need to be coordinated.
If the floor forms part of a wider renovation, reviewing the broader Kitchen Remodeling scope can prevent a flooring decision from conflicting with cabinets, plumbing, appliances, or later finish work.
Check the Subfloor Before Trusting the Final Budget
A Kitchen Flooring Calculator cannot see what is underneath existing tile, vinyl, laminate, or wood. That is why subfloor condition is one of the biggest reasons an early estimate changes after demolition.
Warning signs include:
- Soft or springy areas underfoot
- Persistent squeaks or movement
- Loose or cracked tile
- Visible swelling near a sink, dishwasher, or refrigerator
- Water staining
- Uneven transitions between rooms
- Cracks that telegraph through the finished floor
- Evidence of previous leaks
- Noticeable dips or high spots
Not every irregularity requires structural work. Some floors only need minor leveling or surface preparation. Soft areas, ongoing moisture, substantial movement, or damaged structural panels deserve more investigation before new flooring is installed.
Tile is particularly sensitive to substrate preparation. TCNA states that recommended tile installations require a properly designed, constructed, and prepared substructure, and its large-format guidance emphasizes the importance of a flat substrate. See Tile Council of North America technical resources.
Expert Tip
If an old dishwasher or refrigerator has leaked, inspect that area before ordering the final flooring quantity. A stain at the surface may be cosmetic, but swelling, softness, or loss of stiffness can point to a larger repair.
Older Flooring and Removal Safety
Older flooring should not be aggressively sanded, ground, drilled, or broken apart until the material is understood. In some older buildings, vinyl floor tile, sheet-floor backing, and certain adhesives may contain asbestos.
The U.S. Environmental Protection Agency lists vinyl floor tiles, backing on vinyl sheet flooring, and adhesives among building materials where asbestos may be found. Read EPA guidance on where asbestos may be found.
For UK properties, the Health and Safety Executive specifically identifies asbestos-containing floor tiles and mastic in its asbestos guidance and provides task-specific advice for asbestos work. See HSE asbestos essentials.
Appearance alone cannot confirm asbestos. If the age or composition of older flooring is uncertain and planned work will disturb it, professional assessment may be appropriate before demolition.
DIY Kitchen Flooring — Pros and Cons
DIY can make sense for certain Kitchen Flooring Calculator scenarios, particularly when the room is simple, the substrate is already suitable, and the flooring system is designed for straightforward installation. It is less attractive when technical preparation drives most of the project risk.
DIY Pros
- Potential labor savings: Labor can form a meaningful part of the total project price.
- Scheduling control: Work can be completed around household availability instead of an installer schedule.
- Good fit for some click systems: Straightforward floating floors can be accessible to a careful, experienced DIYer.
- Work can be phased: A homeowner may be able to remove trim, prepare the room, or complete finishing work separately.
- Direct quality control: Careful DIYers can take extra time around doorways, transitions, and visual layout.
DIY Cons
- Subfloor diagnosis: Knowing when a dip, crack, or soft spot is acceptable requires more judgment than simply laying planks.
- Waste risk: Poor layout planning can consume extra tile or planks quickly.
- Tile complexity: Mortar coverage, substrate preparation, flatness, joint layout, and cutting require skill.
- Expansion errors: Floating floors need installation clearances specified by the manufacturer.
- Appliance complications: Dishwashers, refrigerators, range legs, and transitions can make a small kitchen surprisingly technical.
- Tool cost: Saws, tile cutters, leveling tools, moisture meters, and other equipment can reduce the expected saving.
- Warranty conditions: Installation requirements vary by manufacturer and product.
- Longer disruption: A kitchen that takes a professional crew a short time may remain unusable much longer as a DIY project.
DIY or Hire a Flooring Professional? Decision Tree
Start here: Is the subfloor flat, dry, stable, and free from obvious damage?
Also Read:
- No → Inspect or assess the substrate before choosing DIY installation.
- Yes → Continue.
Does the flooring require mortar, glue, nailing, specialist cutting, waterproofing details, or advanced substrate preparation?
- Yes → Professional installation is usually the safer choice unless you already have relevant experience.
- No → Continue.
Does the kitchen have an island, several doorways, angled walls, difficult transitions, or complex pattern?
- Yes → DIY may still be possible, but layout and waste risk increase.
- No → Continue.
Will heavy appliances or cabinetry affect finished-floor height or expansion space?
- Yes → Verify manufacturer instructions and appliance clearance before proceeding.
- No → Continue.
Does the product warranty require specific installation conditions or professional work?
- Yes → Follow the warranty and installation requirements.
- No → Continue.
Is older flooring present that may require testing or controlled removal?
- Yes → Assess the material before disturbing it.
- No → A simple click-lock project on a sound substrate may be a reasonable DIY candidate.
Decision Outcomes
- Reasonable DIY candidate: simple layout, suitable subfloor, homeowner-friendly installation system.
- DIY with caution: moderate cutting, several transitions, minor preparation, or appliance constraints.
- Professional installation recommended: tile, complex wood installation, major leveling, specialist adhesive, difficult layout, or premium material with high mistake cost.
- Inspect before proceeding: moisture, soft subfloor, structural movement, suspected hazardous material, or unexplained damage.
Common Kitchen Flooring Mistakes
Ordering Exactly the Measured Area
An exact-area order leaves no allowance for cutting, breakage, defects, pattern adjustment, or later repairs. Use a product- and layout-appropriate waste allowance rather than buying only the visible floor area.
Ignoring Product Batch or Shade Consistency
Tile shade and some flooring finishes can vary between production runs. Ordering the full required quantity at once reduces the risk of discovering later that replacement stock does not match well.
Installing Before Fixing an Active Leak
A waterproof-looking surface cannot protect the structure from a leaking supply line, dishwasher connection, or refrigerator water line. Correct the moisture source before covering the floor.
Ignoring Dishwasher Clearance
A thick new floor can raise the finished height. If the dishwasher is trapped between the new floor and countertop, future service or replacement can become difficult.
Trapping a Floating Floor
Fixed cabinets or islands can interfere with the movement required by some floating flooring systems. Check manufacturer instructions instead of assuming all click-lock floors can be installed the same way.
Choosing by Purchase Price Alone
The lowest material price does not account for preparation, repairability, maintenance, installation difficulty, or replacement consequences.
Ignoring Transition Height
New flooring may sit higher or lower than an adjoining hall, dining room, or living space. Transitions should be planned before the material is ordered.
Throwing Away Every Spare Piece
Keeping matching planks or tiles can make future repairs much easier, especially after a product is discontinued.
Assuming a Floor Is Flat Because It Looks Flat
Long dips and high spots can be difficult to see until a long straightedge or other suitable measuring method is used.
Comparing Quotes With Different Scope
One contractor may include removal, subfloor preparation, trims, and waste disposal while another excludes them. The lower number may represent less work.
Myth vs Fact — Kitchen Flooring
Fact
Purchase price is only one part of the decision. Preparation, installation difficulty, maintenance, repairability, and replacement risk can change long-term cost.
Fact
A water-resistant or waterproof surface does not stop every leak from reaching joints, edges, walls, appliance penetrations, or the subfloor.
Fact
Floating-floor requirements vary by manufacturer. Some systems need uninterrupted expansion space and should not be pinned beneath fixed cabinetry.
Fact
Real installations create waste from cutting, damaged pieces, pattern alignment, and unusable offcuts, so the order quantity normally exceeds measured floor area.
Fact
DIY can reduce labor cost, but tool purchases, wasted material, preparation errors, and corrective work can reduce or eliminate the saving.
Kitchen Flooring Planning Checklist
Kitchen Flooring Planning Checklist
- Measure the actual flooring area.
- Confirm the flooring manufacturer’s waste and installation guidance.
- Check how many corners, doorways, alcoves, and transitions require cutting.
- Inspect for signs of subfloor or moisture problems.
- Resolve active plumbing or appliance leaks before installation.
- Plan flooring around cabinets, islands, appliances, and doorways.
- Check dishwasher and appliance clearance.
- Check finished-floor height against adjoining rooms.
- Confirm underlayment, adhesive, mortar, membrane, or fastener requirements.
- Compare contractor quotes using the same project scope.
- Confirm what demolition and disposal work is included.
- Order enough matching material for the project and future repairs.
Case Study — Comparing Two Kitchen Flooring Decisions
Modeled case study: A homeowner has a 175-square-foot kitchen connected to a 90-square-foot dining area. The existing kitchen floor is worn sheet flooring, and the homeowner is deciding between LVP and porcelain tile.
Situation
The initial Kitchen Flooring Calculator estimate makes LVP appear more affordable because the material and installation method are simpler. Porcelain tile sits higher in the range and requires more labor.
Calculator Estimate
The homeowner first estimates only the 175-square-foot kitchen. After considering the open doorway into the dining room, they decide that stopping the new material at the threshold would create an awkward visual break. The scope increases to 265 square feet plus waste.
Hidden Consideration
After the old floor is lifted, the area beside the dishwasher shows swelling and slight movement. The problem is not severe enough to condemn the entire floor, but that section needs assessment and repair before either finish is installed.
The tile option also places more emphasis on substrate flatness and rigidity. The LVP option still needs a suitable flat substrate, but the installation assembly is different.
Comparison
The homeowner now compares:
| Issue | LVP Option | Porcelain Tile Option |
|---|---|---|
| Initial budget | Lower | Higher |
| Moisture exposure | Good product options available | Strong surface performance |
| Subfloor demands | Requires flat, suitable substrate | Requires careful tile substrate preparation |
| Comfort | Softer feel | Harder underfoot |
| Installation difficulty | Lower for suitable click system | Higher |
| Future replacement | Potentially easier | Demolition can be more involved |
Decision
The homeowner chooses LVP, not simply because it is cheaper, but because comfort, installation disruption, and the connected dining area matter more to the household than the harder tiled finish.
A different household might reasonably choose porcelain because of appearance, heat resistance, or long-term surface durability.
Lesson
The Kitchen Flooring Calculator provided the starting budget, but the final decision changed after the real floor area and subfloor condition were understood. That is how the calculator should be used: as a planning framework, not as a substitute for site information.
How to Compare Flooring Contractor Quotes
A flooring quote should be compared by scope, not only by the number at the bottom.
| Scope Item | Quote A | Quote B | Question to Ask |
|---|---|---|---|
| Flooring material | Included | Excluded | Who supplies it, and what specification? |
| Waste allowance | 10% allowance | Unclear | How much material is being ordered? |
| Old floor removal | Included | Extra | Does removal include disposal? |
| Subfloor preparation | Minor prep included | Excluded | What counts as minor preparation? |
| Underlayment/membrane | Included | Material only | Is installation included? |
| Transitions and trims | Included | Extra | How many doorways are covered? |
| Appliance moving | Included | Owner responsibility | Who disconnects and moves appliances? |
| Cleanup | Included | Included | Does this include debris disposal? |
| Warranty | Specified | Unclear | What workmanship warranty applies? |
A Kitchen Flooring Calculator may show that both quotes fall inside a reasonable planning range while still leaving one quote much more complete than the other.
Ask contractors to identify exclusions. A short list of exclusions is often more useful than a vague statement that “installation is included.”
When Flooring Is Part of a Larger Kitchen Remodel
Flooring decisions become more complicated when cabinets, appliances, plumbing, lighting, electrical circuits, or structural work are changing at the same time.
A new island can alter both the flooring layout and electrical scope. If the remodel adds appliance circuits, island receptacles, new lighting, or other electrical work, the Kitchen Electrical Upgrade Calculator can help separate that budget from the floor itself.
Large kitchens also magnify flooring decisions because every material upgrade applies across more square footage. If flooring is only one line item in a major renovation, compare it with the wider project using the Large Kitchen Remodel Calculator.
When an existing kitchen is being enlarged, flooring continuity becomes a design and cost issue. A homeowner may need to decide whether to match an older floor, replace the entire connected area, or create a deliberate transition. The Kitchen Extension Calculator is useful when the floor forms part of an expanded kitchen footprint.
The Kitchen Flooring Calculator remains valuable in each case, but the flooring estimate should be coordinated with the larger sequence rather than treated as an isolated project.
Expert Tips for a More Reliable Flooring Budget
Photograph Hidden Conditions During Demolition
Photos of the exposed floor can help document cracks, water staining, patching, or previous repairs before the new floor covers them.
Keep the Product Specification
Save the exact product name, color, batch information, plank dimensions, and installation instructions. That information becomes useful for future repairs.
Check Floor Height Before Appliances Return
Even a modest increase in finished-floor thickness can matter around dishwashers, door swings, plinths, transitions, and base cabinets.
Expert Tip
Before ordering flooring for an open-plan kitchen, decide where the new material will actually stop. The cost difference between a 170-square-foot kitchen and a 300-square-foot kitchen-dining area is much larger than a small change in waste allowance.
Ask What Preparation Is Excluded
The phrase “floor preparation included” is too vague. Ask what happens if leveling, damaged panels, cracks, moisture treatment, or additional underlayment are needed.
Check Adjacent Rooms Before Ordering
A new kitchen floor may be technically correct yet look awkward if it creates a poor height transition or an unnecessary visual break.
Separate Appearance From Technical Suitability
A flooring sample can look perfect under showroom lighting but still be a poor fit for a kitchen with frequent spills, dogs, heavy chairs, or difficult sunlight.
Retain Spare Material
A few matching pieces stored properly can turn a future repair from a major replacement problem into a manageable fix.
Follow the Manufacturer’s Instructions
Generic advice is secondary to the instructions for the exact flooring product. Expansion gaps, underlayment, adhesive, moisture limits, acclimation, and cabinet restrictions can differ between systems.
Frequently Asked Questions
How much flooring do I need for my kitchen?
Measure the actual floor area that will receive flooring, then add a waste allowance suited to the material, room geometry, and installation pattern. A Kitchen Flooring Calculator can handle the basic quantity estimate, but irregular rooms, diagonal layouts, herringbone, and large-format tile may require a larger allowance than a simple rectangular floor.
How much extra flooring should I order?
There is no single percentage that suits every project. Straightforward installations often need less extra material than layouts with islands, numerous cuts, diagonals, or pattern matching. Some vinyl guidance uses about 10% as a planning reference, but product instructions and installer advice should take priority for the specific project.
Also Read:
What is the best flooring for a kitchen?
The best choice matches the household’s priorities. LVP/LVT can suit kitchens where moisture resistance and easy maintenance matter. Porcelain tile offers a hard, durable surface. Engineered or solid wood may suit homeowners who prioritize natural appearance and repairability. The Kitchen Flooring Calculator can compare budget impact, but performance should guide the final choice.
Is LVP good for kitchen floors?
LVP is commonly used in kitchens because many products offer strong water resistance, easy cleaning, and relatively simple installation. Product quality varies, so check wear-layer specifications, joint design, installation instructions, and warranty conditions rather than assuming every LVP floor performs the same.
Is vinyl or laminate better for a kitchen?
Vinyl often has an advantage where repeated moisture exposure is a concern, while laminate may appeal to homeowners who prefer its feel or appearance. Kitchen-rated laminate products vary in moisture performance. Compare the exact products rather than making the decision from the category name alone.
Is porcelain tile better than LVP for kitchens?
Porcelain is harder and can provide excellent resistance to water and heavy wear, but it is also harder underfoot and usually more demanding to install. LVP is softer, often less expensive, and easier to replace. The better option depends on comfort, budget, substrate condition, and desired appearance.
How much does kitchen flooring cost per square foot?
The US installed cost varies widely by flooring type. Current 2026 market guides place vinyl across a broad range around $2–$22 per square foot, engineered hardwood around $7–$20, and many tile installations above those lower-end resilient flooring levels. Use a Kitchen Flooring Calculator with your actual material and project conditions rather than one national figure.
How much does kitchen flooring cost per m² in the UK?
UK pricing depends on material and fitter scope. Current Checkatrade benchmarks list laminate around £30/m² for material plus roughly £30/m² installation, engineered wood around £50 plus £45 fitting, and LVT around £35 plus £45 fitting. Porcelain installation can average around £90/m² depending on specification and preparation.
Should kitchen flooring go under cabinets?
Not always. Floating floors may need movement around fixed cabinets, while bonded tile and some fixed wood systems are handled differently. Follow the product installation instructions and coordinate the floor with cabinets, islands, appliances, and future remodeling plans.
Should flooring be installed before or after kitchen cabinets?
The sequence depends on the flooring system and remodel scope. A full remodel may install some fixed flooring systems before cabinets, while floating products are often fitted around permanent cabinetry. Manufacturer instructions, appliance clearance, and the cabinet design should determine the sequence.
Can I replace kitchen flooring without removing cabinets?
Yes, many flooring replacement projects keep existing cabinets in place and fit the new flooring to the cabinet edges or toe-kick area. The detail becomes more complicated if floor height changes, damaged flooring runs beneath the cabinets, or an island must be moved.
Is DIY kitchen flooring actually cheaper?
DIY can reduce labor cost when the substrate is already suitable and the flooring system is straightforward. Savings can disappear if the project requires expensive tools, extra material due to cutting mistakes, floor leveling, specialist tile work, or later repairs.
Why is flooring installation labor so expensive?
Installation involves more than placing boards or tiles. Measuring, layout, demolition, preparation, cutting, fitting around cabinets and doorways, transitions, adhesives or mortar, trim work, cleanup, and correcting uneven surfaces can take substantial time. Small kitchens may also attract minimum service charges.
What happens if contractors find a damaged subfloor?
Installation may need to stop until the damage is assessed and repaired. Minor leveling is different from water-damaged panels, structural movement, or deterioration. A Kitchen Flooring Calculator estimate should be revised if the required preparation changes materially.
How can I tell whether a flooring quote is fair?
Compare at least the material specification, quantity, waste allowance, old-floor removal, disposal, subfloor preparation, underlayment, transitions, trim, appliance handling, cleanup, and warranty. A lower quote is not automatically better if it excludes work included by another contractor.
Should kitchen flooring match the adjoining room?
It does not have to, but open-plan spaces usually look more deliberate when the transition is planned. Matching flooring can create visual continuity, while contrasting materials can work when the threshold or change in use provides a logical stopping point.
Can new flooring raise the floor enough to affect a dishwasher?
Yes. Flooring thickness, underlayment, backer board, leveling compound, or tile assemblies can raise the finished floor. Check the dishwasher opening before installation so the appliance can still be removed for servicing.
How long does kitchen flooring installation usually take?
A simple small-room floating floor may take far less time than tile, patterned flooring, or a project with demolition and subfloor repair. The realistic schedule depends on preparation, material, layout, curing requirements, and appliance or trim work rather than floor area alone.
Use the Estimate to Make the Next Decision
A Kitchen Flooring Calculator works best when the number on screen leads to better questions. Confirm the real area being covered, decide how much waste the layout requires, inspect the subfloor, check cabinet and appliance constraints, and compare materials based on kitchen performance rather than price alone.
Before accepting a contractor quote, compare it with the same scope used in your Kitchen Flooring Calculator. Removal, preparation, transitions, appliance handling, trims, and finishing should either be included or clearly identified as separate work.
If the floor is only one piece of a larger renovation, connect the estimate to the wider Kitchen Remodeling budget so flooring decisions do not conflict with cabinets, electrical work, plumbing, or appliance installation.
About the Author
Arden Cole Linscott (Expert — Residential Construction & Remodeling Cost Analysis)
Arden Cole Linscott focuses on residential construction and remodeling cost analysis, with an emphasis on helping homeowners interpret estimates, compare project scope, identify cost risks, and make practical budgeting decisions. His HomeCostHub content is structured around clear assumptions, real-world project variables, and the difference between early planning estimates and site-specific contractor quotations.



Scroll to bottom
Remodeling Cost Calculators